Travelling to China in 3 Days – What VPNs Currently Work?
When a foreigner first enters China, one of the biggest challenges is accessing international social media apps. Platforms like WhatsApp, Instagram, Facebook, and even some work tools are blocked. This makes it difficult to stay in touch with family or manage business smoothly.
The solution is a VPN, but the real questions are:
- Which VPN works in China?
- Should you choose free or paid options?
- How to set it up properly the first time?
After years of trial and error, I’ve found the answer: Clash for Windows.
I’ve been using Clash for the past three years on my Windows laptop, and it has never disappointed me. The only difficulty most beginners face is during the first-time configuration. Once you get it set up, using it becomes simple and reliable.
That’s why I created this complete step-by-step guide:
- 📥 Official download links (safe & updated)
- 🖼️ Screenshots for every step
- 🎥 YouTube video tutorial so you can follow along easily
Watch Tutorial in English
Watch Video in Urdu
Step 1: Download Clash for Windows
Open the link below using your Windows browser or Chrome and scroll down to find the latest version of Clash for Windows App from the official website.

Download from Clashforwindows.org
If you can’t download on your laptop, try downloading on your phone first, then transfer the Clash file to your laptop and install it.
Step 2: Open Clash for Windows
After installation, you will see the Clash for Windows dashboard interface as shown below:

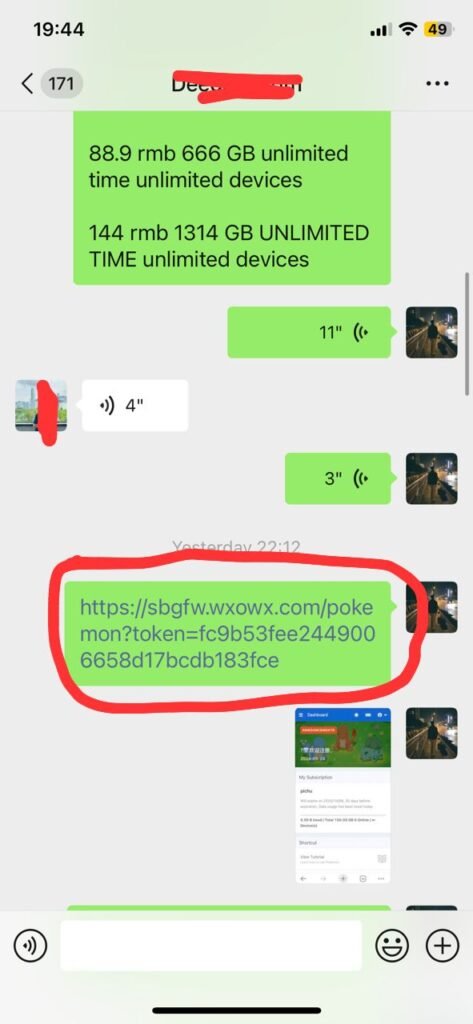
Step 3: Contact for Subscription
After confirming installation, contact me on WeChat (hk901338) or WhatsApp (+44 07355218022). Provide your Gmail and confirm your subscription plan here.
Step 4: Receive Subscription Link
Once subscribed, I’ll send you a subscription link and proof screenshot like this:

Step 5: Paste the Link
Copy the provided link from WeChat or WhatsApp and open Clash. Make sure your system proxy is set to OFF as shown below:

Step 6: Open Profile Section
Open Profile section and click on paste icon and paste that link.
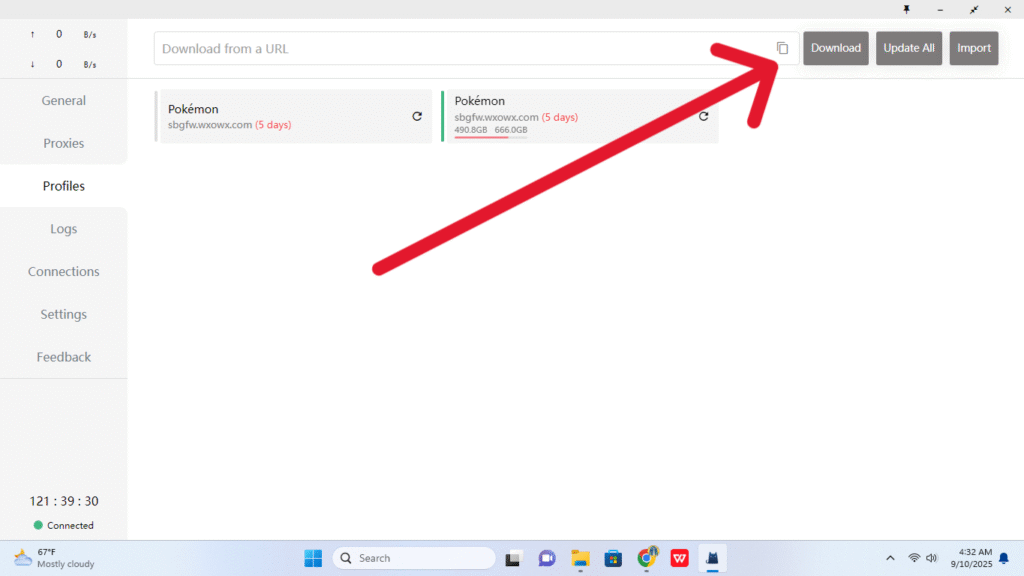
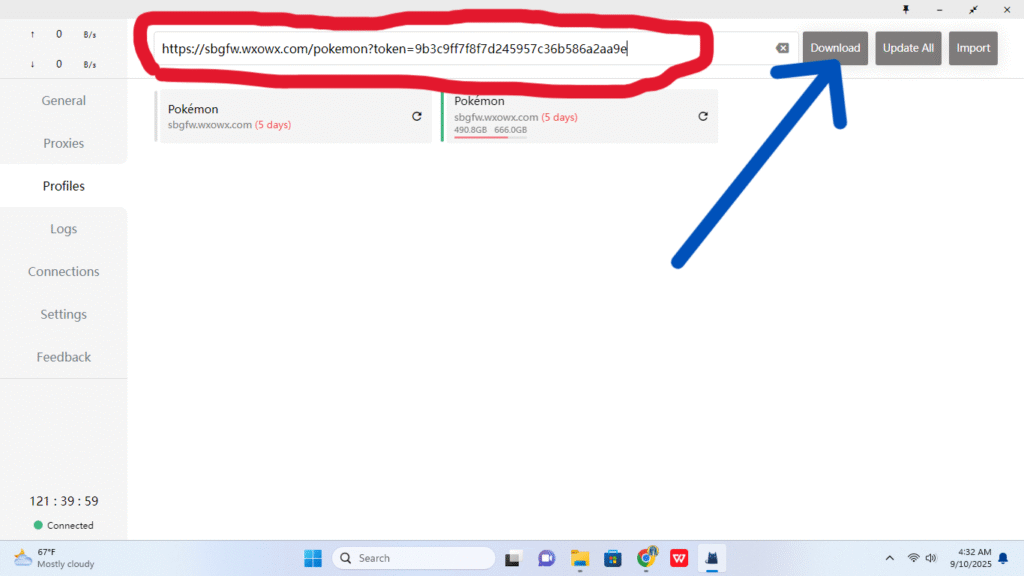
Step 7: Add Subscription Link
Click on Paste and paste your subscription link, then click Download.
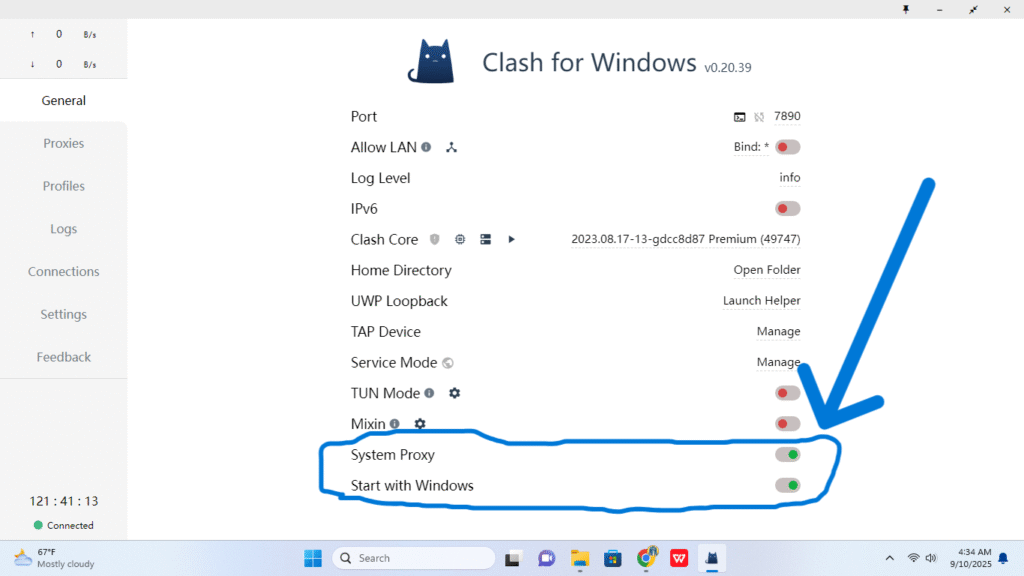
Step 8: Enable System Proxy
After adding your subscription link, go to General in the dashboard and turn ON System Proxy.
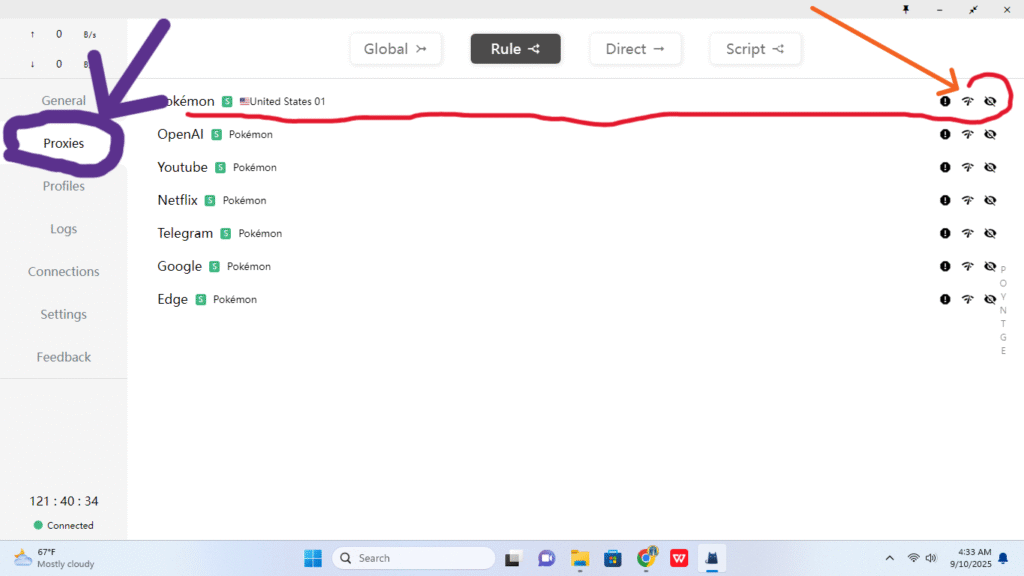
Step 9: Configure Proxies
Click on Proxies in your dashboard. Make sure it is set to Rule. You should see Pokemon in the first line — click on the WiFi button twice.
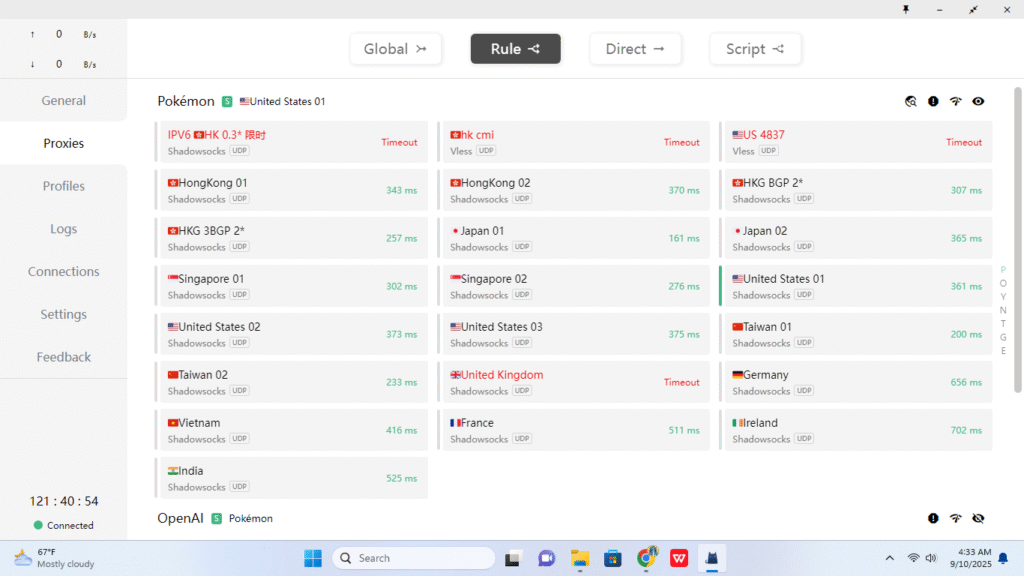
Step 10: Select Server
You’re done! Now choose the server you want to use. Note: servers with lower ms values have higher speed.
Note: If you can’t download directly, kindly contact me on WeChat and I’ll send you the file. The remaining steps will be the same.
👉 By the end of this guide, you’ll have Clash for Windows fully installed and working — and you’ll never struggle to connect with your family or manage your online work again.
If want to setup VPN in your Android, macOS, Laptop or IPhone, click on provided links.
Complete guide for Clash for Windows Complete guide for ClashX for macOS
Pingback: Clash for Android中文 best VPN in China for Foreigners
Pingback: ClashX Meta, ClashX Pro for macOS: Best VPN in China for mac - Dr. Kashif